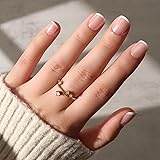
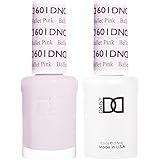
Launching a successful press-on nail business demands a curated selection of high-quality products. As the accompanying video highlights, the sheer volume of nail products available can be overwhelming, making initial investment choices critical. This guide expands on those essential items, offering deeper insights into why each product is indispensable for any aspiring press-on nail entrepreneur.
Establishing Foundation: Safety Gear & Nail Tips for Your Press-On Nail Business
Safety is paramount in any nail service. Proper personal protective equipment (PPE) must be utilized consistently. Nitrile gloves are considered essential; these prevent monomers in uncured gel products from skin contact. Cumulative exposure can lead to serious allergies and irritation over time. A mask should also be worn during filing or buffing processes. Fine plastic dust particles must not be inhaled, as this can cause respiratory issues.
Full-cover nail tips form the base of every press-on set. Various shapes and lengths are available on the market. Initial focus should be placed on popular or personally favored styles. For instance, short almond shapes often see high demand. Brand quality varies significantly, so research is important. Apres tips, for example, are known for their thin cuticle edge and reinforced free edge, providing a natural look with superior strength.
Choosing the Right Nail Tips: Material and Form Factor
Nail tips are typically made from ABS plastic or a soft gel material. Gel tips are often preferred for their flexibility and seamless integration with gel polish systems. The “C-curve,” or the natural curve of the nail tip, influences wearability and appearance. A less pronounced C-curve may suit flatter nail beds, while a deeper curve offers more structural integrity. Sizing is also critical; a comprehensive range of sizes must be offered to cater to a diverse clientele. Each tip’s apex, the highest point of the nail, also impacts its durability and aesthetic.
When starting a press-on nail business, it is advisable to begin with a few versatile shapes. Popular options include coffin, square, almond, and stiletto. Different lengths, from short to extra long, also cater to various customer preferences. Selecting a brand known for consistent sizing and minimal manufacturing imperfections saves time. These initial choices will lay a strong foundation for your product line.
Essential Tools: Nail Stands, Files, Buffers & Cleansers
Nail stands are vital for organized and efficient artwork application. Acrylic nail stands are highly recommended over hollow silver varieties. The solid construction of acrylic stands provides greater stability. This increased weight reduces the likelihood of tipping during painting. Additionally, acrylic stands often feature a wider surface area. This ensures small nail sizes fit securely, preventing accidental painting of the stand itself.
A good quality file and buffer are next on the list. Files are used for removing manufacturing imperfections from nail tips. They also aid in minor shaping adjustments. Buffers prepare the nail surface for optimal gel adhesion. They create a fine texture for proper bonding. Chemical etching solutions can also be used for preparation, offering a consistent and time-saving alternative.
Optimizing Your Workspace: Adhesion and Preparation Tools
The stability of nail tips on stands is crucial for intricate designs. While many stands include tacky putty, it is often not strong enough. Nail tabs, designed for temporary wear, offer superior adhesion to nail stands. This method ensures tips remain secure throughout the creation process. The difference in hold can be both seen and felt, providing a more reliable workspace.
For surface preparation and cleaning, 80% or higher isopropyl alcohol is necessary. 99% alcohol is often preferred for its purity, avoiding diluted products. This is used to wipe the inhibition layer from cured gel. Alcohol also cleanses nail tips before product application. Acetone, specifically 100% pure acetone, is another essential solvent. It effectively cleans brushes, thins gel polishes for art, and removes cured gel. Both products are versatile and cost-effective alternatives to specialized gel cleansers.
The Heart of Your Art: Gels, Lamp & Adhesion
Gel products form the core of your press-on nail creations. This category can seem extensive, but initial purchases should be strategic. Two or three tones of nude gel are recommended; these are highly popular and versatile. Nude gels with slight translucency often appear more natural when applied. A white and black art gel are indispensable for basic designs. These highly pigmented gels allow for intricate lines and French tips. These can last a long time, indicating their value.
Color gels can be acquired gradually. Starting with quality red, blue, and yellow gels allows for extensive color mixing. Basic color theory knowledge enables the creation of a vast spectrum of hues. Neon colors, however, typically require specific gel purchases. Finally, a decent quality no-wipe topcoat is essential. Top coats come in various finishes like matte or glossy. Different viscosities also exist, requiring personal research for individual preferences.
Ensuring Durability: Curing and Adhesion for Your Press-On Nails
A reliable nail lamp is possibly the most critical investment for your press-on nail business. This device cures, or polymerizes, gel polishes. Understanding lamp wattage and UV/LED specifications is vital. Under-cured gel can lead to service breakdown and potential allergic reactions. The correct lamp ensures optimal gel hardness and longevity. Researching trusted sources like The Nail Hub’s videos on lamp selection is highly advised.
Once your press-on nails are complete, proper adhesion is necessary for customer use. Two main forms are available: nail glue and nail tabs. High-quality nail glue can provide up to two weeks of wear or more. Its strong bond is preferred for extended application. Nail tabs offer a temporary solution, ideal for short-term wear. Many customers appreciate the flexibility of tabs for special events. Offering both options caters to diverse client needs. Nail tabs can also be repurposed for securing nails to display stands during creation.
The Final Touch: Packaging Your Press-On Nail Business Products
Effective packaging is the final step before sale or gifting. A professional presentation elevates the perceived value of your press-on nails. Simple, cost-effective methods are ideal for beginners. Mounting nails onto backing cards using double-sided tape is a common practice. Pre-cut double-sided tape is often favored for its uniformity and ease of use. This avoids the sticky mess associated with tape rolls.
Unused tacky putty from nail stands can find a new purpose here. A small piece placed on a pen or pencil tip creates an excellent tool. This allows for precise placement of nails onto the double-sided tape. While elaborate branding is appealing, focus should remain on nail quality initially. Simple cue cards can serve as effective backing cards when starting out. Many successful artists use basic paper for this purpose. The emphasis is on delivering a quality product. Consistent branding can be developed over time as your press-on nail business grows.


